By Harry Roberts
Harry Roberts is an independent consultant web performance engineer. He helps companies of all shapes and sizes find and fix site speed issues.
Written by Harry Roberts on CSS Wizardry.
N.B. All code can now be licensed under the permissive MIT license. Read more about licensing CSS Wizardry code samples…
Two of my absolute all time favourite development tools have to be Git and Vim. Easily. I’ve used both almost daily for the last (at least) five or so years, so I want to share a handful of tips to help when using both together.
This is a very short post that only shares a couple of pertinent tips, so if you have any advancements or additional insights then please do let me know.
If you’re anything like me, you’re a bit of a stickler for formatting, consistency, and process. If that is the case, you might be interested in setting up a Git commit template that will be loaded every time you run:
$ git commit
This template works across all text editors (i.e. you don’t have to be using Vim), and will automatically pre-populate the commit message with your chosen placeholder text, ready for you to fill in and customise.
The benefits of a template are manifold, but the main points for me are:
Luckily, Git commit templates are incredibly simple to set up. Start by creating
a file called .git-commit-template in your home directory (~/).
Now open this file and add your placeholder text. Mine is as simple as this:
[refs #00000] Subject line

Body (72 chars)
The first line is the title of the commit. This should be short enough to be digestible, but long enough to convey the general scope of the commit.
You’ll notice that it starts with [refs #00000]: this is a reference to an
issue or ticket number that lives elsewhere (e.g. GitHub issues). Let’s say
somebody opened an issue on your open source project to let you know that your
function wasn’t rounding its output to the nearest integer. That issue will have
an associated number, e.g. 57.
To that end, we’d have a commit title that looks like this:
[refs #00057] Fix rounding issue with grid mixin
This means that when I’m viewing a $ git log, I can quickly see what each
commit is working toward, which is particularly useful when I’m logging any
non-feature branches that contain commits from many different places. As well as
that, we also get the added benefit of services like GitHub actually linking
that commit message directly to the issue in their GUI.
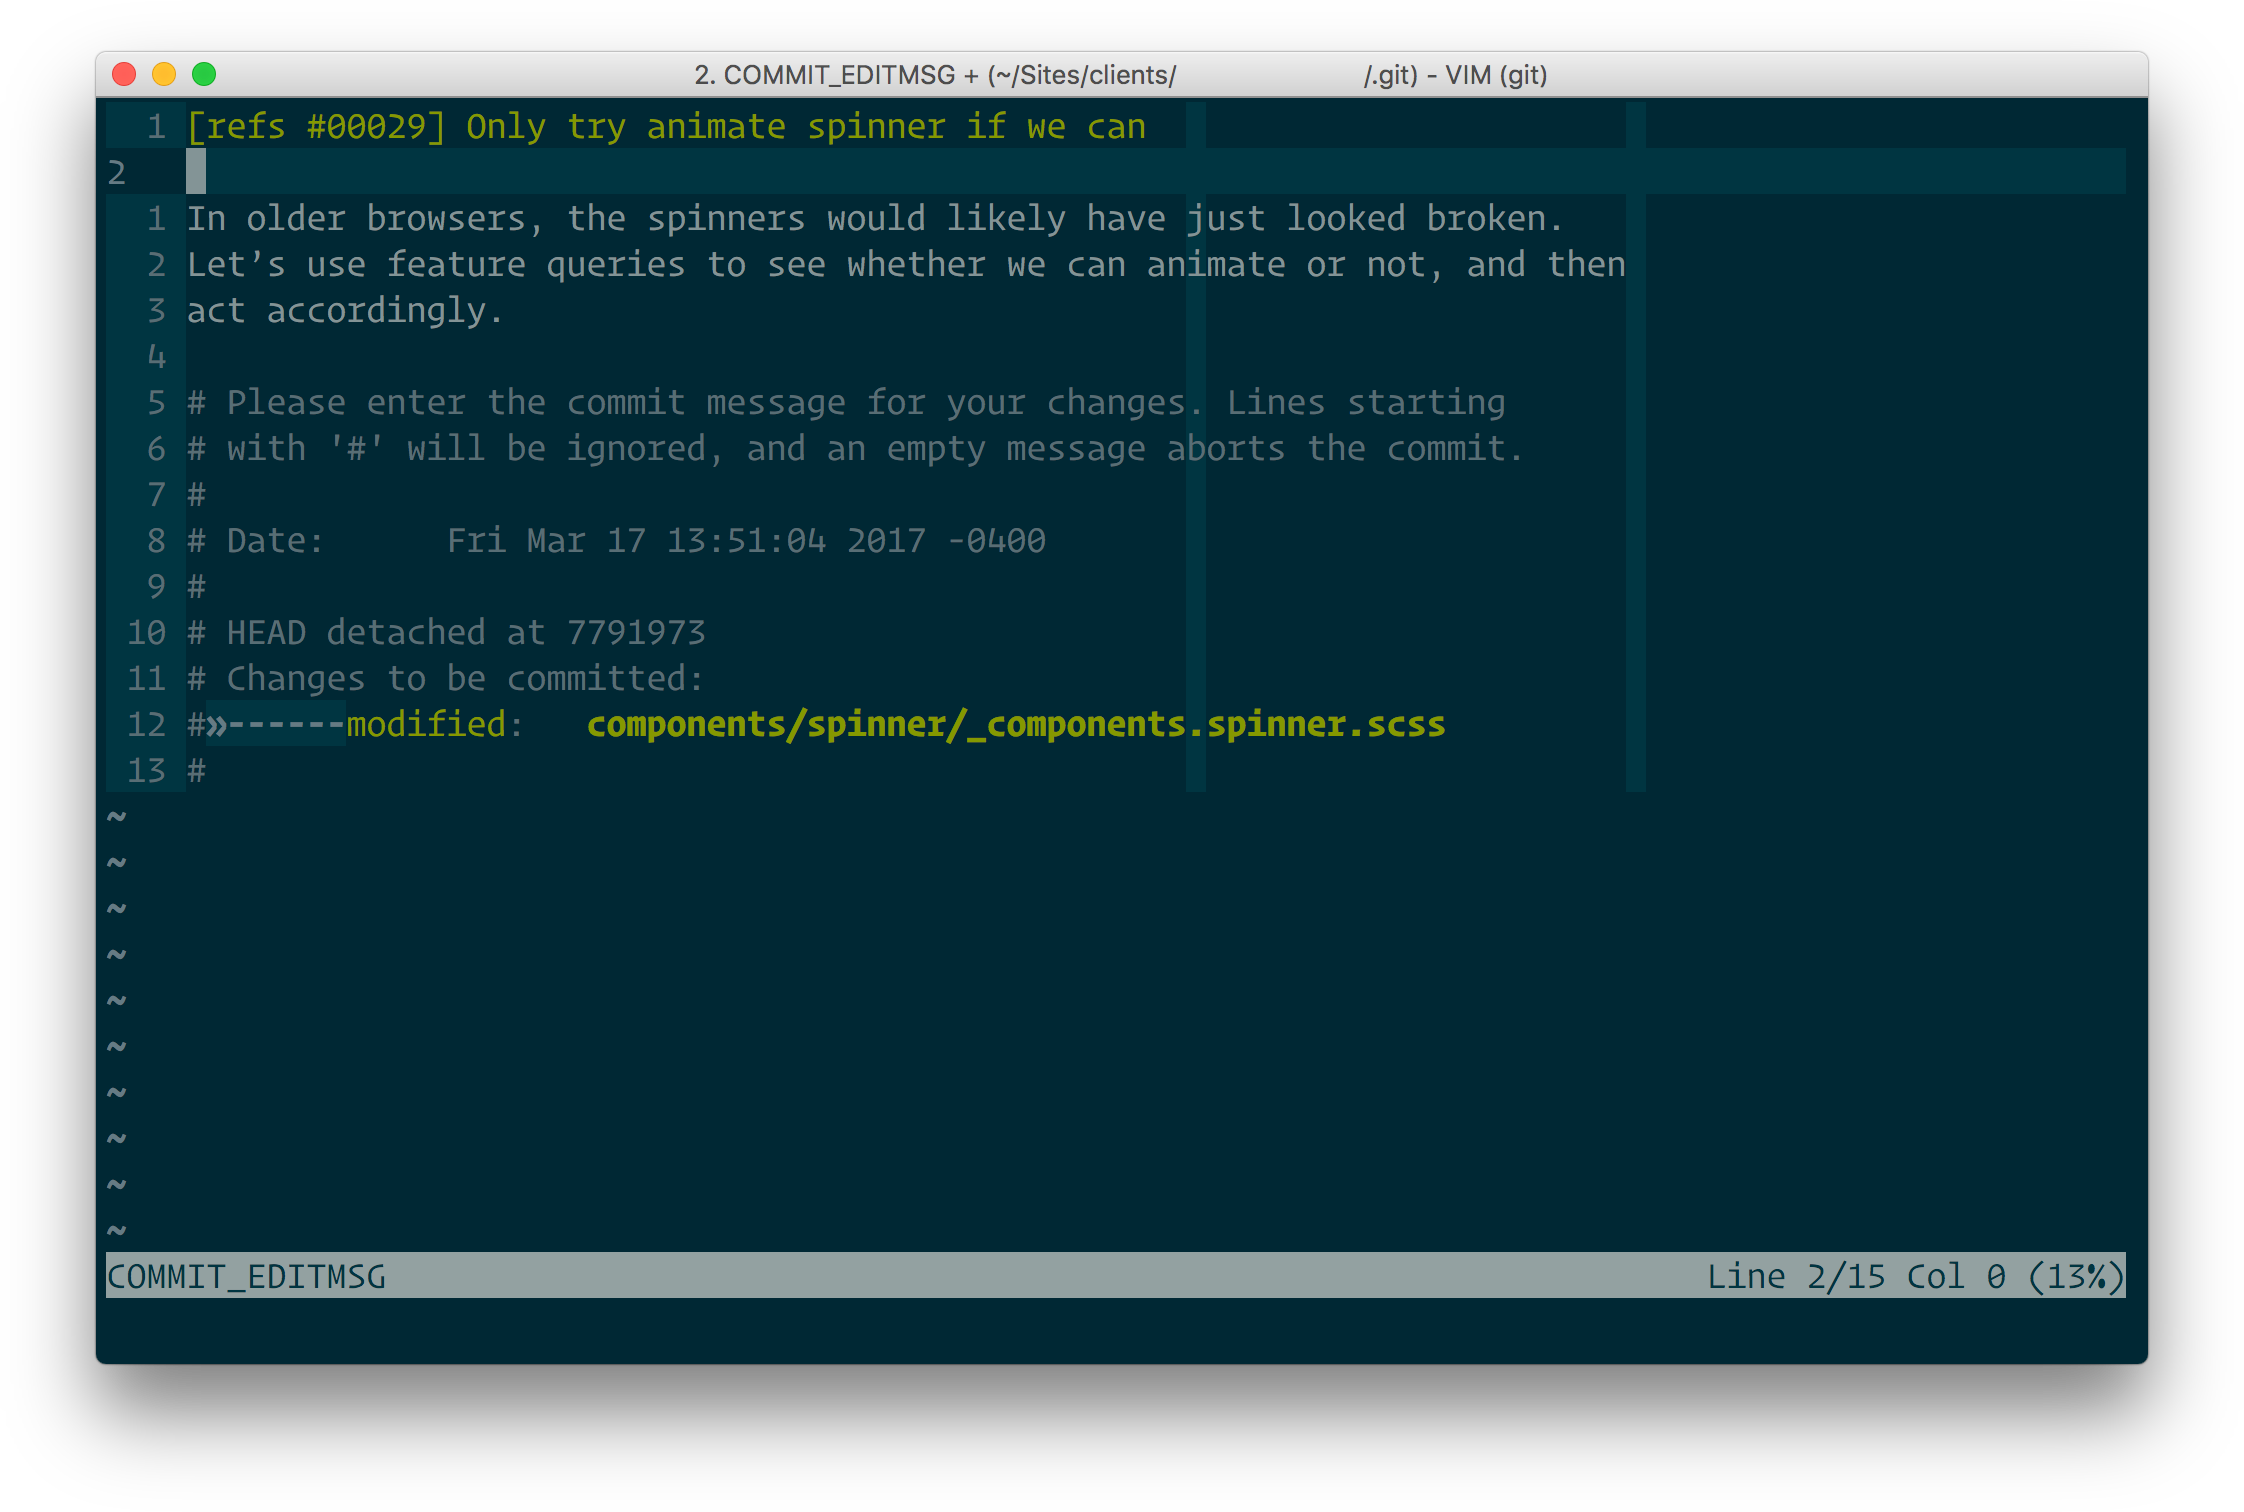
The next section is the body of the commit message, where we describe or explain the commit in greater detail, for example:
[refs #00057] Fix rounding issue with grid mixin

The grid mixin was working largely as expected, but would not round
the output if passed an odd number. This led to scenarios where
developers were seeing grid gutters of e.g. 12.5px.

I’ve simply wrapped the Sass `round()` function around the output, so
people will now get the nearest integer whether rounded up or down.
This expanded message offers up additional insights as to why the commit exists and how we implemented it, and is also constrained to 72 characters in width to ensure it fits on most (if not all) terminal screens1.
Finally, we need to tell Git that the template exists:
$ git config --global commit.template ~/.git-commit-template
Which should leave something like the following new lines in your .gitconfig:
[commit]
  template = /Users/<username>/.git-commit-template
By default, whenever we write a commit message (not using the -m flag) we’re
going to get thrown into Vim. If you’re a Vim user, this is great! This is
exactly what we want. If you’re not a Vim user, skip
ahead: I got you covered.
You may well have Vim set up to constrain your text editing to a certain number
of columns (usually 80). If you do, great! If you don’t, simply add the
following to your .vimrc:
" Force the cursor onto a new line after 80 characters
set textwidth=80
This will forcibly push your cursor onto a new line (and wrap your text for you!) if you go beyond your 80 character limit. This is really nice whilst writing code, because 80 characters is a pretty widely agreed standard.
We can also set another option—colorcolumn—to let us know visually when we’re
approaching our boundary:
set colorcolumn=81
What this will do is highlight our 81st column which lets us know that no text should sit on this line. Pretty neat!
However, as above, our commit messages need to be constrained to 72 characters, not 80. How do we solve that problem?
One option is to run this every time we end up writing a commit message:
:set tw=72
…but who’s got time for that?! Not me.
Luckily we can use an autocmd to solve this for us! We can tell Vim that
Hey! Any time I enter a Git commit message, please can you do something for
me?
That looks like this:
" However, in Git commit messages, let’s make it 72 characters
autocmd FileType gitcommit set textwidth=72
autocmd FileType gitcommit set colorcolumn=73
If the filetype is a Git commit message, automatically set new values for
textwidth and colorcolumn.
As nice as this is, we can actually go one step further: wouldn’t it be nice to
not have to hard code our colorcolumn every time we change our textwidth? It
turns out that we can actually set colorcolumn to be relative to
textwidth2:
set colorcolumn=+1
This means that the column immediately after (+1) our textwidth cutoff point
will be highlighted, regardless of whether the number is 80, 72, or anything. So
now our Vim settings look a little like this (There is a more up to date
snippet below):
" Force the cursor onto a new line after 80 characters
set textwidth=80
" However, in Git commit messages, let’s make it 72 characters
autocmd FileType gitcommit set textwidth=72
" Colour the 81st (or 73rd) column so that we don’t type over our limit
set colorcolumn=+1
It’s just a single line of config to get Vim in perfect shape for commit messages.
It gets even better! The ideal commit message has a title constrained to 50
characters and a body constrained to 72 characters. The setup we have above will
only highlight our 72 character limit for body text though, meaning we have to
work out our title’s limit more manually. However, I recently learned that the
colorcolumn setting can accept more than one value! We can highlight both our
title and our body’s constraints:
" Force the cursor onto a new line after 80 characters
set textwidth=80
" However, in Git commit messages, let’s make it 72 characters
autocmd FileType gitcommit set textwidth=72
" Colour the 81st (or 73rd) column so that we don’t type over our limit
set colorcolumn=+1
" In Git commit messages, also colour the 51st column (for titles)
autocmd FileType gitcommit set colorcolumn+=51
The key difference in this snippet is the last line, in which we don’t set a new
colorcolumn value, but we actually append the existing one (by using +=) and
add column number 51. This means that—in Git commit messages—we’re still
highlighting the column immediately after our character limit by using the
relative +1 value, and the 51st column by using the absolute 51 value.

…or Sublime, or VS Code, etc.
You might not want to use Vim at all, and that’s cool! But you will have probably noticed an annoying default in Git: commit messages open in a Vim instance!
I can’t remember exactly, but I’m willing to bet that my first ever exposure to Vim was through a merge conflict or expanded commit message in Git. As a full-time Vim user now, this isn’t an issue at all, but if you prefer Atom, or Sublime Text, or VS Code, or whatever it is you use, you’d probably rather write your commit messages there than in Vim.
Thankfully this is a really simple change to make:
$ git config --global core.editor <your editor of choice here>
For example, if you use Atom:
$ git config --global core.editor atom
If you use Sublime:
$ git config --global core.editor 'subl --wait'
This will now open all of your commit messages there, instead of the command
line. For Sublime you need subl; for TextMate you need mate. If in doubt,
just Google Open <your editor of choice here> from the command
line
.
Hopefully now you’ll see something like this in your .gitconfig:
[core]
  editor = atom --wait
The --wait flag tells the editor to Wait for window to be closed before
returning.
, meaning our committing doesn’t resume/continue until we’ve saved
and closed our text editor window.
Vim users, we’re probably pretty well set already, but if you want to make double sure then just run:
$ git config --global core.editor vim
Which will look like this inside of ~/.gitconfig:
[core]
  editor = vim
Regardless of which editor you use, it’s worth knowing that you can tie it and Git together a little more closely. This should, if nothing else, make you more comfortable, if not more productive.
I’d really recommend this article if you want to read more about good commit message formatting. ↩
Many thanks to Chayoung You for the tip. ↩
N.B. All code can now be licensed under the permissive MIT license. Read more about licensing CSS Wizardry code samples…
Harry Roberts is an independent consultant web performance engineer. He helps companies of all shapes and sizes find and fix site speed issues.

Hi there, I’m Harry Roberts. I am an award-winning Consultant Web Performance Engineer, designer, developer, writer, and speaker from the UK. I write, Tweet, speak, and share code about measuring and improving site-speed. You should hire me.
You can now find me on Mastodon.
I help teams achieve class-leading web performance, providing consultancy, guidance, and hands-on expertise.
I specialise in tackling complex, large-scale projects where speed, scalability, and reliability are critical to success.